OS X comes come with support for windows file sharing, aka CIFS or SMB, but you don't have a lot of options when it come to configuring your machine to act as a server. The software used to share out file from the mac is samba, and if you felt like it, you could edit the smb.conf file to control samba. But there's an easier way, and it's called swat.
It's very important to be careful when you're configuring samba with swat--some of the options can disrupt the network in such a way as to make folks very upset. You should contact your network administrator before you start.
Consider using a firewall if you don't already to control access to swat and to your machine over CIFS/SMB. Without a firewall, someone could try to use swat to turn on filesharing and access your data or configuration files. And it's very unlikely that you need to allow the entire internet to access your machine through windows shares, so use a firewall to limit access to only those machines that need access to your files.
Also, for this to work, you will need to have installed the Developer Tools, and the root user account needs to be enabled (to do this, use the Netinfo program in Utilities).
First you need to edit some files.
swat 901/tcp #samba configuration server
swat stream tcp nowait.400 root /usr/sbin/swat swat
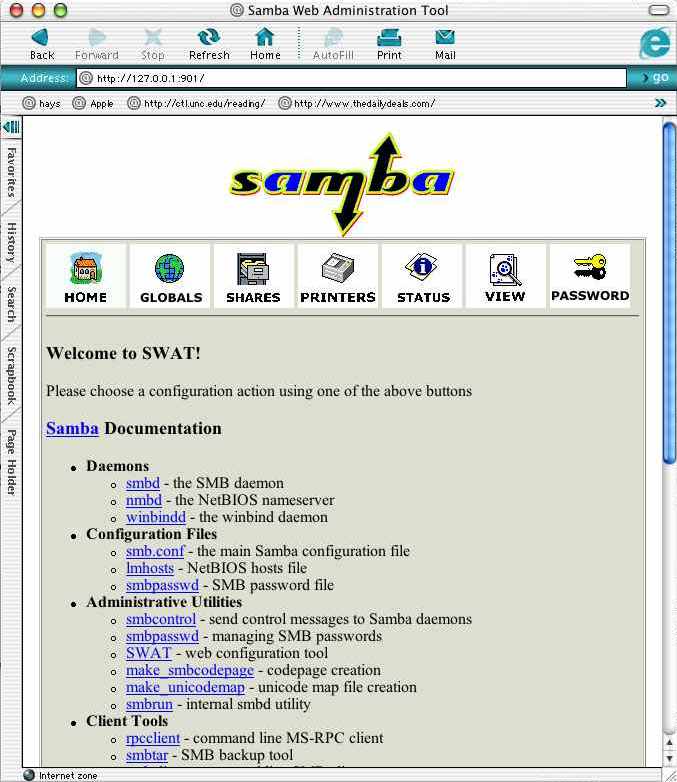
Open a browser and go to http://127.0.0.1:901, and login using root. This password is sent in the clear, but since you're using the browser to access swat on the localhost, you're safe. If everything worked, you should see a screen like this:

You'll want to read through the docs--they can be a bit daunting, but you should try to get an understanding of how this stuff works.
If, on the other hand, you get the error "400 Server Error, chdir failed - the server is not configured correctly" you probably need to install the developer tools.
Here's a list of settings you should use or check. Most important is that you do not set up your machine on the network to act as a domain controller or wins server. These options are off by default, but it's an important enough issue that I've included those settings in the check list below.
Workgroup: Set this to whatever workgroup or domain your network uses for windowsNetbios name: This is the name your machine will appear as. It need to be unique on the entire network, and it needs to be no more than a dozen characters.
Server String: This is used to announce the kind of server in the network neighborhood list. For security, it's not a bad idea to change this to something non standard, such as "it's a mac"--that will reduce the chance that a automated program can be used to detect what kind of service is running.
Security: This one's a bit tricky, so read the docs carefully. If you want to just share out a single folder, or just share files with a few machines, share is a good choice. If you're part of a larger network, server or domain is likely what you'll want to use--these settings allow you to share out folders to users in your workgroup or domain and not have to maintain userid and password lists (a very good thing). I use server, that setting tells your machine to pass the userid and password to a windows machine you specify to ask it if the password's right. If you use domain, you'll need to add your mac to the windows domain, using the smbpasswd command, but you should work with your windows domain administrator if you want to do this.
Encrypt Passwords: Yes is good, but may not work depending on your setup
Password Server: If you're using Server under security, set this to a realiable windows machine in your domain or workgroup. The wins server is a good choice.
Preferred Master: Make sure this is set to false if you are on someone's network
Local Master: Set this to no
Domain master: Set this to no also.
Wins server: Enter the ip name or number of your network's wins server.
Wins support: This should be set to no, otherwise your machine will act as a wins server.
Remote Announce: Enter the wins server and domain name for your network here, in the format of wins.server.ip.name/DOMAINNAME. This will cause your machine to announce itself directly to the wins server, increasing the chance it will show up properly in the browse lists.
You set up shares under the shares button. Again, be careful when setting up shares, you are opening up your machine to the network! By default, there's a home directory share that's set up which lets users (eg you) login with their password to access their home directory.
If you're the only one or one of only a few users that use your mac, what you may want to do is set up a public share where you can let others place files for you to use, or for you to put files that you want other people to pick up.
Guest Ok: this means that one doesn't have to supply a password at all to access the share. Use this with caution, it means anyone can connect to the share.
There's a good O'Reilly's article on samba.
Thanks to Greg Welch for getting me started with swat